Showing posts with label stitch length. Show all posts

Monday, March 29, 2010

Things I learned in Class


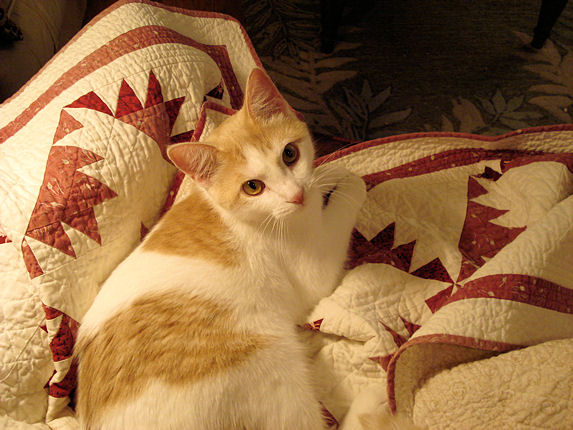
Oliver helped me unpack from my trip, and has grown since I was away!  I think his fur is getting a little longer too, oh no....  We were so enjoying the very short crewcut style he had at first. 

He has spent this week following me around, first in love and astonishment that I came back home, then in glee and joy, and now he is doing sneak attacks and flying out of nowhere to land on me.  Usually he likes to attack a knee or ankle, but occasionally he lands on my head.  I have a few needle holes in me from these attacks, scars of an ecstatic young cat.  He naps when he can take no more excitement.

What did we learn in our class last week?  Many things, some new to me, some the old familiar discoveries made by students as we progressed through a variety of free motion skills.

One woman said the best thing she learned was to have the quilt move freely, and that was accomplished with a Supreme Slider from Pat LaPierre at http://www.freemotionslider.com/

This tool is invaluable for smooth quilting and even stitches, but be sure and tape even the self-stick ones to the bed of your machine, with at least one piece of tape to the machine itself, not the surround.  Plexi surrounds tend to move in class and then the Slider moves, and you are quilting through it along with the quilt.  Not good for needles.  Or the Slider.

Lower the feed dogs when you use a Slider.  The repeat movement if they are "up" can create a dome around the opening that can be permanent and ruin the Slider.

Another thing that is so important is how the thread is positioned on the machine for the best possible delivery, stitch, tension, no breaking needles or thread. 

Larger cones or spools need to be horizontal so the tension is accurate.  Another good option is a cone thread holder.  One student had one, but not the spindle for the thread cone.  The result?  More problems than one could imagine.  As soon as we had one with a spindle and it was set up properly, perfect stitches.

Many times the thread winds around the little end caps that hold a spool on the horizontal spindle.  My advice?  I never use the end caps and I have never had the thread fall off the spindle.  There is no chance of the thread winding around and getting caught, causing tight tension or broken thread or needles or everything. 

I fixed many thread pathway "issues" and then quilting can progress smoothly.  If you have to stop constantly with problems your quilting will suffer.  Being able to have confidence in your machine and the setup for quilting lets you quilt with freedom and you will improve dramatically.

Thread color was such a big quagmire of indecision.  The only way you will know what looks right on the fabric you are quilting is to try quilting with the thread on a small swatch/sandwich first.  The days of putting a spool of thread on the quilt and saying YES!  are over.  Since I began using fine #100 silk for quilting, all preconceived ideas of color went out the window as I began to explore what worked.

Yesterday I quilted some samples of a new design for a handout and used bright fuschia silk thread on deep brown/purply/mottled fabric and it looked great.  Brown or purple or eggplant also looked fabulous if you want this design to be background and recede around a focal point.  Your thread color choices determine what happens to the visuals in a quilt. 

I also discoverd that most people do have one "better" side for feathers, and it is usually the left side.  Some could do the right side of a vine better than the left, but this was not common.  Work until both sides look acceptable, then quilt the same thing horizontally, at an angle, upside down, to increase your skills.

Batting does make a difference.  Not only in ease of learning a design, but in the final result.  We used wool batting for the extra pouf and dimension, and also were able to flatten backgrounds with more dense quilting. 

Leaving areas of puff showcases your designs and draw the eye, creating great visual dimension.  Do not quilt the life out of your quilt. 

Stencils can work for you!  Many who used them had delightful results, a beautiful design and their own freehand work surrounding it or complementing it.  The gingko stencil was particularly lovely. 

Thread tension changed with the pilot. Many times the way a person moves hands changes the proper tension to bad tension, tight threads.  When I quilted at the machine, changing no settings, the right hand movement and stitch length let the tension setting work, do the job, and create lovely stitching.

Larger erratic stitches made for too-tight tension, and diminished any puff in the design.  The correct stitch length for the thread type resulted in perfect tension.  It also needed tweaking for the type of design.  Long soft curves might work at a tension of #3, whereas close small frothy bubbles (in photo below) needed a tension of #2 for the stitches to be perfect.

Remember to reset tension on electronic machines each time you power up.

Smooth, even hand movements are key.  That is one thing I can't help you do.  You have to acquire the mental discipline to keep hands moving smoothly and evenly to achieve those beautiful stitches and smooth designs. 

If you have to lift hands to move them to another area of the quilt, stop the machine, move them, take a brief break for your eyes by looking up and re-focusing, and then begin again with the needle up.  Try to avoid"walking" your hands over the surface of the quilt as you run the machine.  Many do not realize this is a bad habit until I point it out.

Try and quilt a bit every day.  By the end of our 5-day class improvement was amazing and noticeable. 

Yesterday I quilted for the first time in a week, and it felt wonderful.  I also discovered Oliver can now sit on the back shelf of my sewing cabinet and stare at the moving needle and the quilt and become totally mesmerized, almost in a trance. 

Obviously he has never seen this before and is entranced with it.  He has quickly discovered sitting on quilts, sleeping on quilts, sleeping under quilts, attacking quilts, but now he likes to see them being quilted.

Keep quilting  - your work gets better every day!
Diane

Oliver helping me unpack. 


Tuesday, November 24, 2009

Tension and Stitch Length!

More information arrives from quilters who are dealing with new, electronic machines. Mercy recently explained her tweaking with the Bernina830 and silk thread, and she reports now that if the stitch length is set at "0," the thread tension on top gets very tight.

I have noticed on some Bernina 440's that when the BSR is used, the tension gets tighter than if a normal free motion foot is used, but of course can be adjusted down so a proper stitch is achieved.

Many things can affect the thread tension on top, even the humidity or color of thread. Dark threads may need a slightly different top tension than ecru, in the exact same thread.

In my first book, Guide to Machine Quilting, I suggested setting the stitch length to zero if you drop the feed dogs and free motion quilt. This was back in the Dark Ages when I used a mechanical machine, no brains, no sensors. Now I don't even think about doing that because my machine knows if I lower the feed dogs I don't NEED stitch length and allows them to rest comfortably in the basement, not moving at all. So I never touch that stitch length dial when the dogs are down.

On the Bernina 830 Mercy found that if she did use the zero stitch length the top tension became way too tight. If you own this machine, don't change the stitch length at all when the dogs are lowered.

All things are interconnected. Be aware.

Hope you are not slaving away too hard here in the US where we have our big Thanksgiving holiday on Thursday. I am hoping to get in an hour or so of quilting today on some ideas I've had before I forget them, and take a break from cleaning and polishing, shopping for food, cooking.

Keep quilting! Your work gets better every day.
Diane

Wednesday, September 23, 2009

Scale and Proportion

When the photo, above, appeared on the cover of the first issue of Machine Quilting Unlimited I cringed just a bit. The stitches looked gigantic. The fabric, could it be burlap? The mistakes, did they show?

Well, yes, of course they did, magnified and blown up and the stitches huge. But the color and punch of this small piece were exactly what the magazine editors were seeking.

Most quilters probably thought this stitch “size” was my normal quilting. It was not. It was very fine quilting, very tiny stitches done on a tightly woven crisp unknown cotton sateen type fabric with an almost impenetrable surface treatment. My friend Liz Armstrong designed and made the tiny piece, smaller than the size of a piece of paper. I quilted it with YLI #100 silk thread and a #60 Microtex Sharp needle, with small stitches, probably about a 1.5 in length.


However, when it was chosen to be used on the cover of this issue it was blown up larger than life size. The stitches look sooooooo big. Quilters seeing this would not even hesitate in thinking the stitch length was about 2.5 or larger, and the thread perhaps a 40 weight. Not!


What is the correct scale and proportion for thread and stitch length in machine quilting? Our wonderful machines can handle very fine threads to quite heavy ones that I personally would probably delegate for the job of tying up tomato plants or wayward roses in the garden, but never think of putting them through my Bernina, gasp. I know, I know….it is done all the time, no harm done. And simply threading the machine with this thread will clean out the thread pathway wonderfully.

So what is the bottom line in correct stitch length? The stitch length depends on the weight, color, fiber of the thread. There is no one perfect answer. The scale of the stitch length must work with the proportion of the design as well.


A nice “golden mean” for stitch length can be found by using a fine long staple cotton like Aurifil #50 (reads like a 70) or Superior MasterPiece, both about the same in fiber and thickness. With this thread in the machine, top and bottom, you can establish a lovely machine stitch and then vary it smaller for finer threads such as #100 silk or larger, longer stitches for heavier threads such as #40. If you do free motion stitching with this set-up, a 1.8 stitch length or finer looks nice, and yes, you’ll probably have to lower the top tension a bit, sometimes a lot, depending on your machine.


If you don’t know what a 1.8 or 1.6 stitch length looks like, first stitch out a line of quilting using feed dogs and a presser foot on the machine, and set stitch length at this number.


You can make several rows at various stitch length settings for comparison to your free motion stitching to get points of comparison. Then try some free motion, still with this thread combo in the machine, and see what you have to do to make your free motion quilting look exactly like the line you quilted with the feed dogs up, and a walking foot or presser foot on your machine.


The fiber content of the thread also determines the stitch length. Lustrous, shiny threads like silk or poly tend to need a smaller stitch than heavy, duller threads, mostly cotton without a sheen to them. However, there are some very lustrous cotton threads (Aurifil, e.g.) and some dull poly ones, so the best thing is to always quilt with the thread and figure out its best tension and stitch length.


A good way to check this is to begin with a fine cotton, get the stitch length established by how fast you run the machine and how you move your hands.


I like to tell students that a faster machine speed and smooth, slow and even hand movement works well for most of us. So slow down your hands, keep them moving smoothly with no jerking or quick changes of direction, and run the machine a bit faster. Get out of first gear! Try the faster speeds on that beautiful piece of machinery you own. Let it own the road for once, but only go as fast as you can still feel “in control” of what you are doing with your hands. The problem then can occur where you hear the machine going faster and automatically speed up your hands.


Speed up the machine a bit, and keep your hands slow, smooth, even.
If an entire area of a design is quilted correctly but there are areas with some large “basting” type stitches, the viewer’s eye goes directly to these. They break up the design and look not so great. They are there because your hands moved too fast in that area for the speed of the machine.


I slow down for tricky places where I can’t see well, or for more demanding and precise types of quilting like echo quilting. And when I say slow down I mean both the speed of my hands and the speed of the machine. Hands and feet work together as one.


And sometimes I speed up when there is “open road” or an easy design I’ve done a million times, and when I speed up that means I move my hands faster and I run the machine faster too.


With more elegant, refined and closely spaced machine quilting, below, I need a finer thread and smaller stitches. Large, open scale and fast quilting can have bigger thread and bigger stitches, but keep them even, and have the proper machine tension.


One of the most frequent comments I get when people see my work in “real life” is that they never realized my stitches were so small. They are.
Because of the very fine thread and the designs I quilt. Both of these things determine stitch length.

When I thread my machine with a heavier thread, I automatically slow down the speed of the machine so with the same hand movement I’m used to I can achieve a bigger stitch length that is appropriate for heavier threads.


Play with your threads and designs. The stitch length will vary accordingly. It will take some experience for you to be able to switch from a fine cotton thread to various weights and fibers, but it can be done very successfully, and it will make your quilting that much more interesting.


Keep quilting! Your work gets better every day.

Diane